I started talking about the Peak Tram in my previous article: here are the hardcore technical details. For a start, the ‘tram’ is actually a cable-hauled two-rail funicular railway!
The lower terminus is 28 metres above sea level and the upper terminus is 368 metres above it, with 1,365 metres of track linking them, the gradient ranging from 4 degrees up to a maximum 27 degrees. The one way trip takes around seven minutes, moving 1400 passengers per hour one way, with around 90 trips made each each day. The track is straight, except for a left hand curve at the lower station, and a right hand curve near the middle. The current trams and haulage equipment date to 1989, provided by Von Roll Transport Systems of Switzerland.
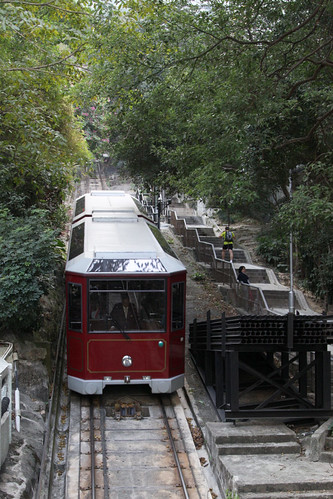
A funicular system has two trams in operation at all times, balancing each other on a single haulage cable that leads from the winding house at the top of the incline. The cable means both trams move at the same time, one moving upwards, the other downwards. The trams cross each other at the midpoint of the incline, where there is a passing loop.
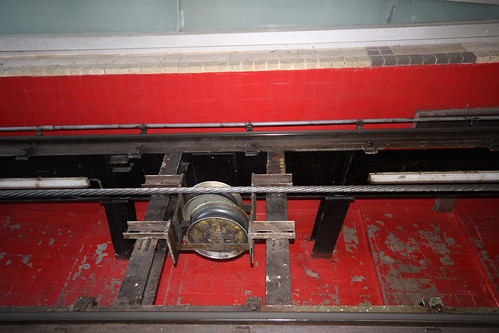
The cables used on the Peak Tram are 44 millimetres in diameter, and are moved at up to 6 metres per second by the electric motor mounted to the cable drum at the top station. The cables run between the tracks, the pair bring separated by a few centimetres. The official website for the Peak Tram seems a bit unclear on how their cable works: they call the tramway a “double reversible funicular system” with two separate haulage ropes that move at the same time.
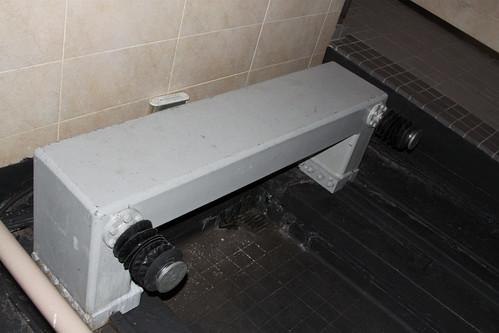
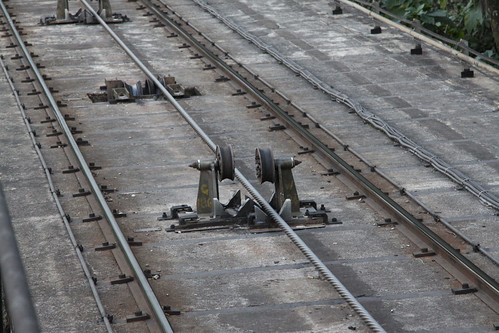
Various pulleys are used to keep the cable moving: due to the varying grades, sometimes the cable needs to be held off the ground.
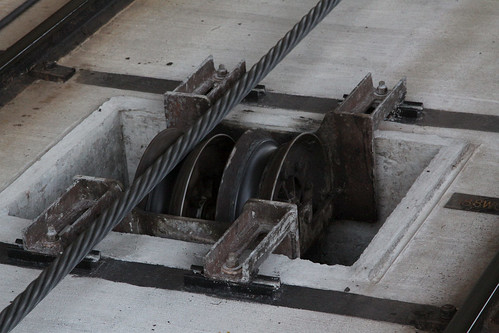
While down in the valleys the cable needs to be held down.
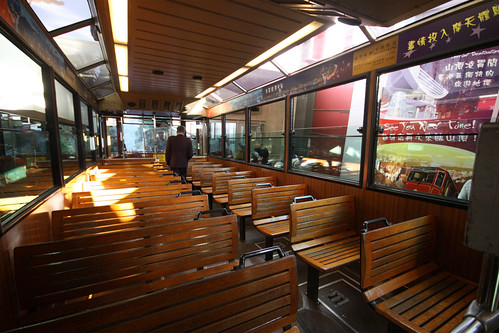
Each tram is actually made up of two carriages articulated in the middle. Each tram carries up to 120 passengers: 95 seated and 25 standing. Inside each tram the wooden bench seats all face uphill, if they didn’t, the gradient would make the passengers slide out. The floor is curved with a number of ‘bowls’ along the passageway: this gives standing passengers a slightly more horizontal area to grab a foothold on, so they can try and remain upright once the incline starts.
Electric lights are provided inside the passenger saloon, yet no obvious form of power supply exists – the 1950s-era tramcars were fitted with a pantograph to collect electricity from a single trolleywire above the track. I assume the current trams use an onboard generator, as the overhead wiring no longer exists, and no third rail pickup can be seen along the line.
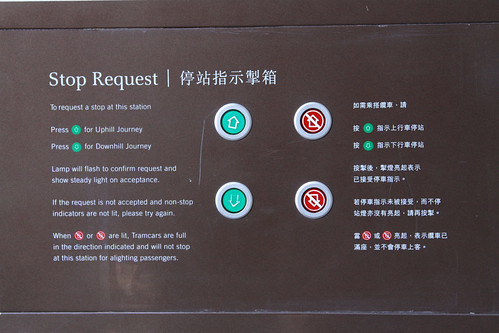
As well as the upper and lower termini, four intermediate stations exist: Kennedy Road, MacDonnell Road, May Road and Barker Road. They operate as request only stops, with intending passengers needing to push a call button located on the platform or inside the tram. A stop request may be rejected by the control room if the next tram is full, if there are large queues of passengers wanting to travel between the upper and lower stations, such as on weekends and public holidays.
Now lets take a ride up the hill…
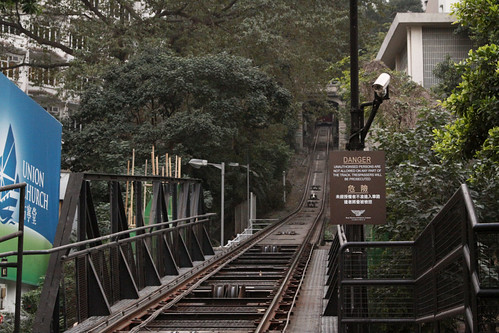
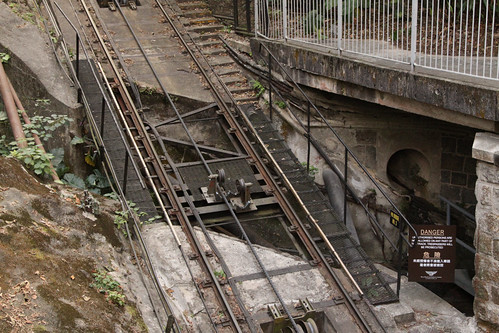
From the lower terminus, the tram takes a sharp turn out of the station, with some hefty pulleys required to get the haulage cable around it.
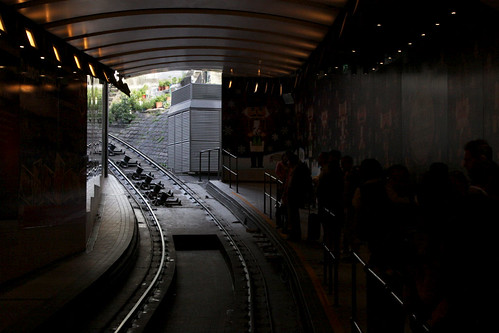
Cotton Tree Drive then passes over the tracks on an overpass.
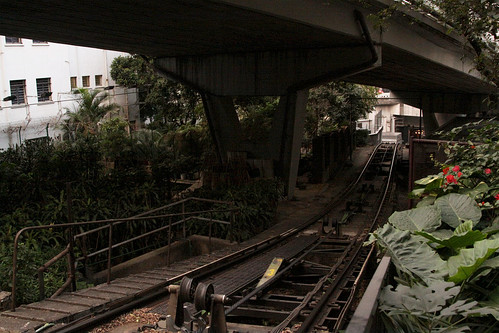
The first station is Kennedy Road: just spitting distance from the previous station. The only facilities provided are the stepped platform, a small shelter, name board, and the call request buttons.
The platform is much longer than that required by the current trams, with the downhill end fallen into disuse and fenced off from public access. I assume that the extra space was needed in the old days, when manual controls made stopping the tram much less accurate.
Immediately after the station, the track crosses Kennedy Road on a steel truss bridge.
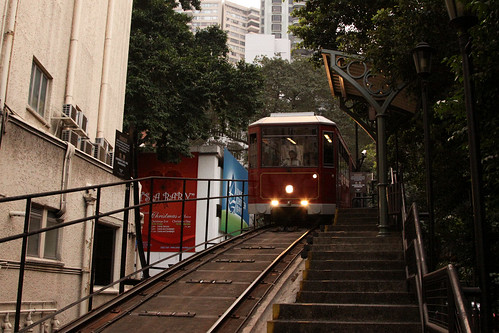
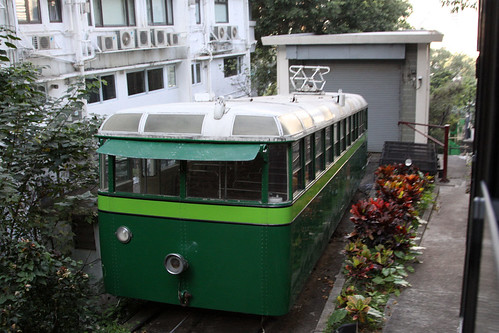
After the bridge the disused tram shed is passed: according to Wikipedia, from the 1950s three trams were used on the line, but only two could be used in service at a time. Today one of the green liveried 1950s-era trams is stabled in the siding leading to the shed, held in place by a haulage cable bolted to the concrete.
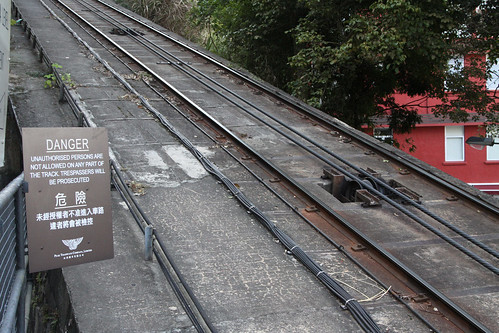
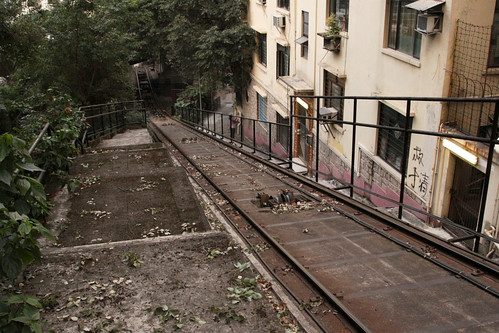
The depot track itself is no longer connected to the rest of the network, the rails have been lifted, and the mainline straight railed.

By now the slope has stiffened – beside the MacDonnell Road bridge is a rack stacked of spare rails, and it is hard to believe that the rails are laying horizontally!
MacDonnell Road station is located uphill of the namesake thoroughfare, and has the same basic facilities as Kennedy Road station.
The bridges in this section are stone arches that cross over the top of the tracks. At Magazine Gap Road the roadway is at an angle, with a sequence of small arches being used for the span.
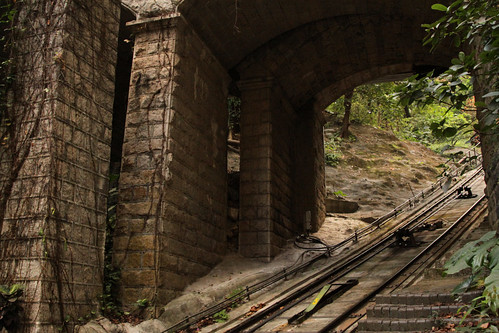
Along the way are a number of bridges over small waterways: numbered from the bottom of the incline, bridge number 3 is located on the uphill side of Magazine Gap Road.
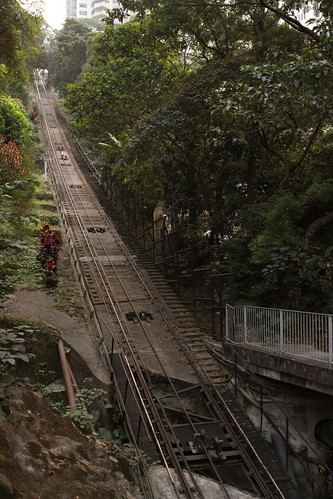
The incline continues on, with the next station along being May Road. I didn’t manage to get there on foot, as it is located some distance away from the previous stations, and up a much steeper slope. The station and passing loop can just be seen at the top of the incline in this photo, below the arch bridge.
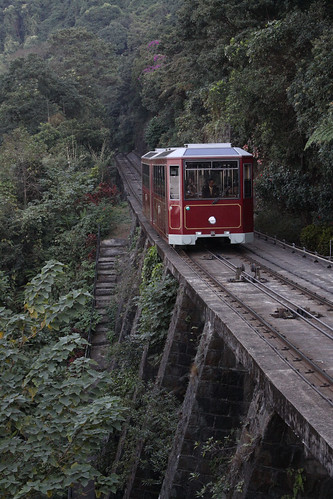
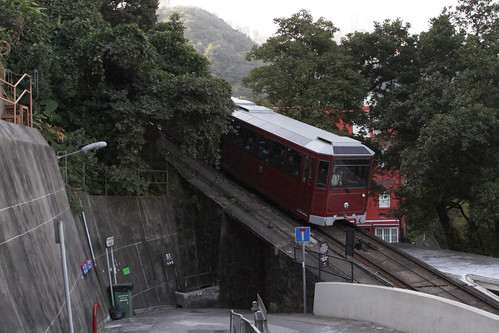
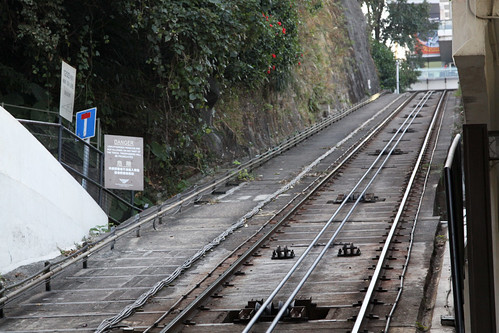
After May Road the tramway leaves the buildings behind, and instead of attacking the incline directly, it makes a right hand turn and runs along the side of a steeper section of hill. Just short of Barkers Road station a viaduct carries the track over a small gully.
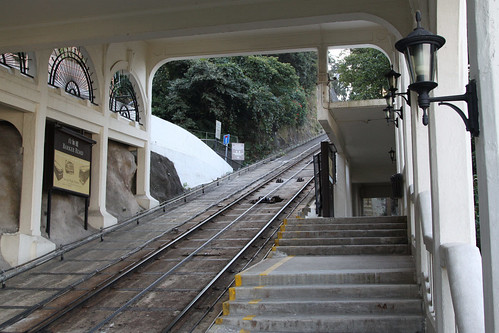
Barkers Road station is the only intermediate station on the line to have a proper station building, a concrete pavilion that was built in the 1930s, at least going by some internet sources. The building roof covers both the platform and the tracks.
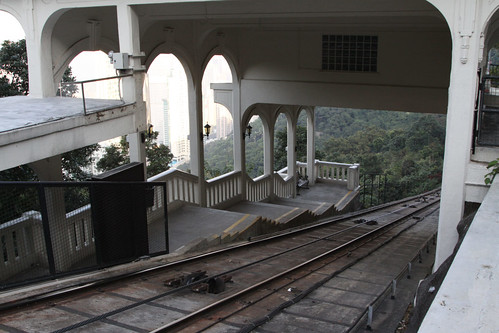
Due to the slope, much of the side don’t have actual walls, but there is a small room dug into the hillside.
By now the tracks are on a 14 degree gradient, where Barkers Road itself passes under the tracks.
From here only a short stretch of track remains until Victoria Peak is reached.
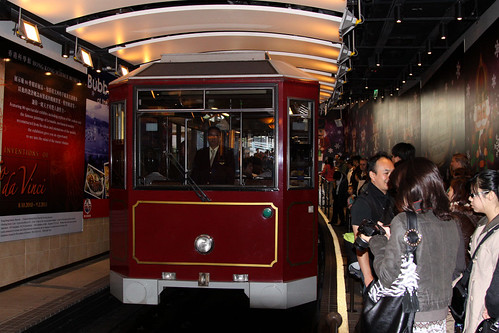
At the top is the control room for the railway, being located at the departure end of the platform. The cable drums and motor are located in the basement of the station, which is part of the Peak Tower shopping centre and observation deck complex.
As for the emergency brake for the trams: it appears that is located on the cable drum itself, with safe operation being dependant on the integrity of the haulage cable. Unlike the lift hill on a roller coaster there is no ratchet to stop you from going downhill, and this dinky little set of buffers at the bottom of the incline won’t stop you!